How to create your own environment
The first step is to identify the requirements for your uses: physical resources, software, interface, data.
In principle, any interface that allows use from the browser can be used. Thus, JupyterLab, VSCode, or desktop environments such as XFCE have already been deployed on myDocker. Likewise, interfaces like RStudio should not pose any difficulty. It is also possible to create environments accessible via other protocols such as ssh.
Any free software that can run under Linux can, in principle, be installed. If you need a non‑free software, contact us to study whether a technical and financial solution might exist. Likewise in the case of software running on another operating system.
It is also possible to plan the inclusion of data directly in the environment. Beyond 1GB, contact us to study together the possible impacts and alternatives. Contact us also if the need for other resources is high (10+ processors, 10GB memory, GPUs, 200+ students).
Once these elements are identified, we recommend looking for a similar image and environment and seeing how they were built to inspire you. You can for this purpose consult the generic environments listed on this site. If necessary, do not hesitate to contact the maintainer to gain access to their configuration. You will then be able to create your own image and your own environment by copying and adapting the configuration.
Most environments use a package manager such as apt, conda, pip, or even guix for
precise reproducibility needs. The adaptation will then simply involve adjusting the list
of packages to install. As a preliminary test, you can try installing the software
directly in the inspirational environment.
We document below some of the configuration elements:
General Information
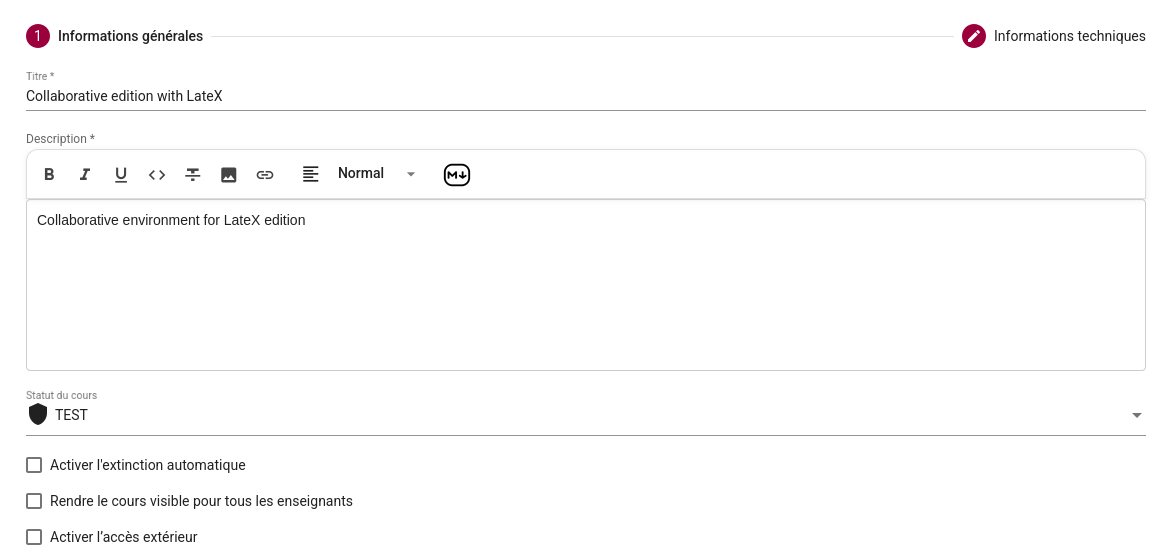
In the “General information” tab of an environment it is possible to specify a certain number of details such as the environment’s title, its description, its status (draft, test, ready that is to say stable, or archived).
Automatic shutdown of the environment
It is possible to configure an automatic shutdown of environments. This feature is intended for cases where one wishes to impose a limited access duration to the environment (exam, access to costly resources, etc.).
If one uses JupyterLab and simply wants the environment to shut down automatically after a period of inactivity, a better alternative is to delegate this task to Jupyter by specifying the appropriate options in the JupyterLab launch command. In the following example, the kernels, terminals and the entire JupyterLab application shut down automatically after 20 minutes (1200 seconds) of inactivity:
jupyter lab --no-browser --ip="0.0.0.0" --IdentityProvider.token={{PASSWORD}} --ServerApp.shutdown_no_activity_timeout=1200 --MappingKernelManager.cull_idle_timeout=1200 --TerminalManager.cull_inactive_timeout=1200Sessions
It is possible to specify “sessions” for courses.
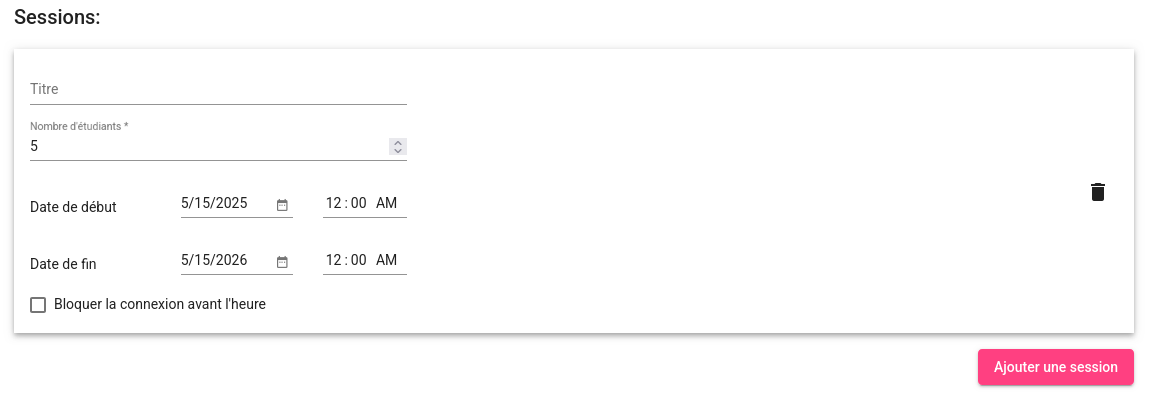
On the instance myDocker@CentraleSupelec, where servers are rented on demand, these sessions allow reserving servers for the indicated times. They are used especially for large courses (several hundred simultaneous students) or courses using heavy resources (GPU). These sessions are subject to validation by the administrators.
On the instance myDocker@Paris
Technical Information
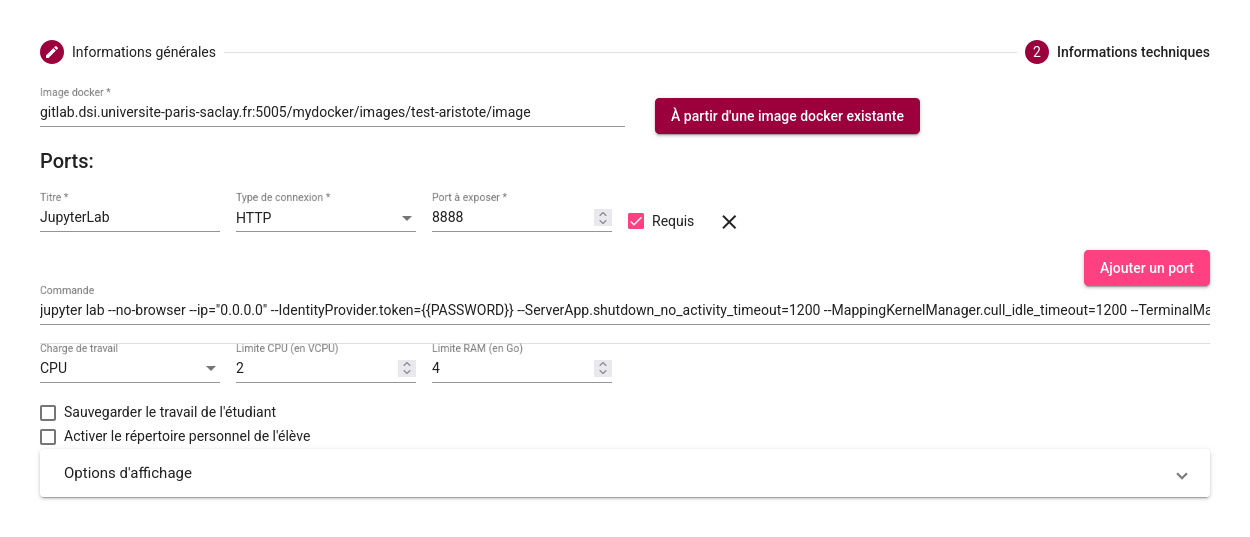
The “Technical Information” tab allows you to define the technical characteristics of the environment: the starting image, the connection type(s) (protocols) and, consequently, the port(s) to open, the command to run at startup, the number of CPUs or GPUs, and the memory to allocate.
Startup Command
This field overrides the value of the CMD variable of the Docker image. By convention,
most images treat this variable as a command to be executed in the environment at
startup. Typically it is used to launch the environment interface, for example Jupyter
Lab:
jupyter lab --no-browser --ip="0.0.0.0" --IdentityProvider.token={{PASSWORD}}This command is also typically used to pass authentication secrets generated by MyDocker
({{PASSWORD}} and optionally {{USERNAME}}) to the environment to restrict access to
it.
Some images, particularly those from the early days of myDocker, deviate from this
convention: they contain a script wrapper_script.sh — defined as entry point — which
is executed at the environment’s startup. The contents of CMD then allow you to specify
the script arguments, separated by spaces as on a shell command line. It is typically
{{USERNAME}} {{PASSWORD}}.
Persistent personal folder
The “Save student work” item enables persistence of a personal folder for the user dedicated to this environment. The “Enable student’s personal directory” item is similar except that the personal folder is shared with other environments.
The “student volume path” is the path where the personal folder is made available inside
the container. It is typically /home/jovyan for an image based on the Jupyter Docker
stack, /home/mambauser for an image based on mambaorg/micromamba.
To determine it, you can start your environment before configuring persistence, open a
terminal and type pwd to obtain the current folder path.
Planned improvements:
improve terminology in the interface for greater consistency.
add a volume manager — especially to host large data, with flexible configuration of which volumes are mounted in the environments.
Display Options
The “Display Options” tab allows configuring how the user accesses the Docker container’s interface. For this, you can configure one or more buttons, each with a connection link.
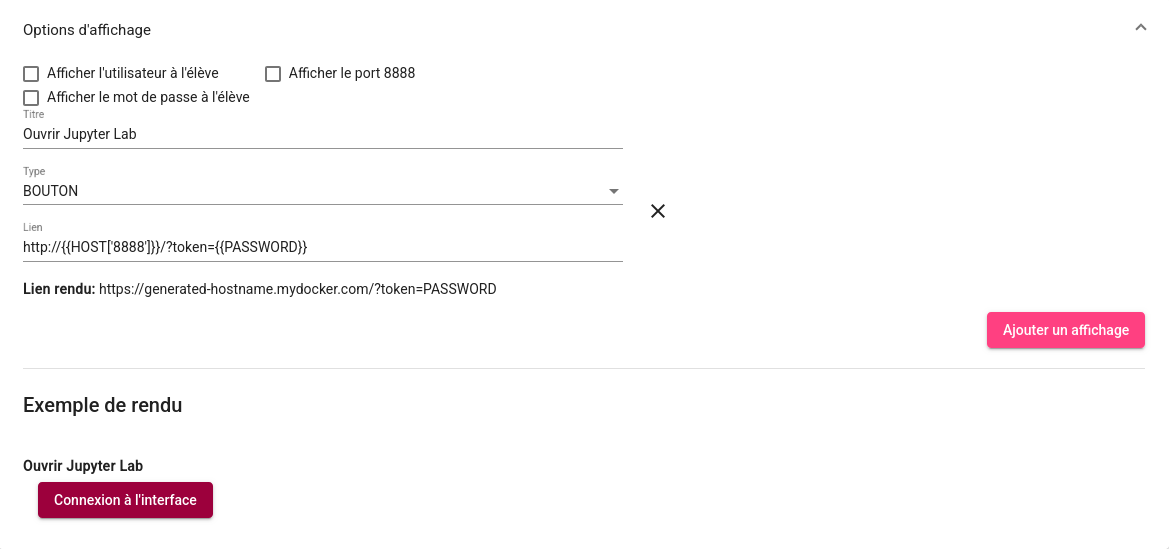
This connection is secured by authentication with a randomly generated password and optionally an associated username that are also passed to the container at its startup. The handling of such authentication depends on the interface used in the Docker container (JupyterLab, ssh, …). Ideally, this step is automated, typically by transmitting the token via the link. For example, with JupyterLab, you can use the following link:
https://{{HOST['8888']}}/?token={{PASSWORD}}Otherwise, the user will have to manually enter the password and any username when opening the interface. Therefore, they must be displayed beforehand: this is possible by checking the “Show password” or “Show user” boxes.
It is also possible to configure a text‑mode display instead of a button. For example, when the environment is designed to be accessed from an external program (ssh, …), this display provides the user with the exact command to run, taking into account the environment’s parameters: host, username, password, etc.
Image build choice
An essential component of an environment is the (Docker) image that contains all required
software or data. For example, it is possible to use one of the
Docker images provided by the Jupyter community
as jupyter/scipy-notebook.
It is also possible to build your own image, typically starting from an existing image
and adding the desired components. The construction of such an image is described by a
file Dockerfile; it is essentially a script indicating the commands to execute to
install the required software and data.
Building an image in mydocker
You can build such an image directly in the integrated editor in mydocker (tab Images).
This editor then allows you to specify:
Metadata about the image: title, description, ...
The content of the
Dockerfile.(optional) the content of a startup script
wrapper_script.sh.(optional) a context zip archive containing a file tree of files.
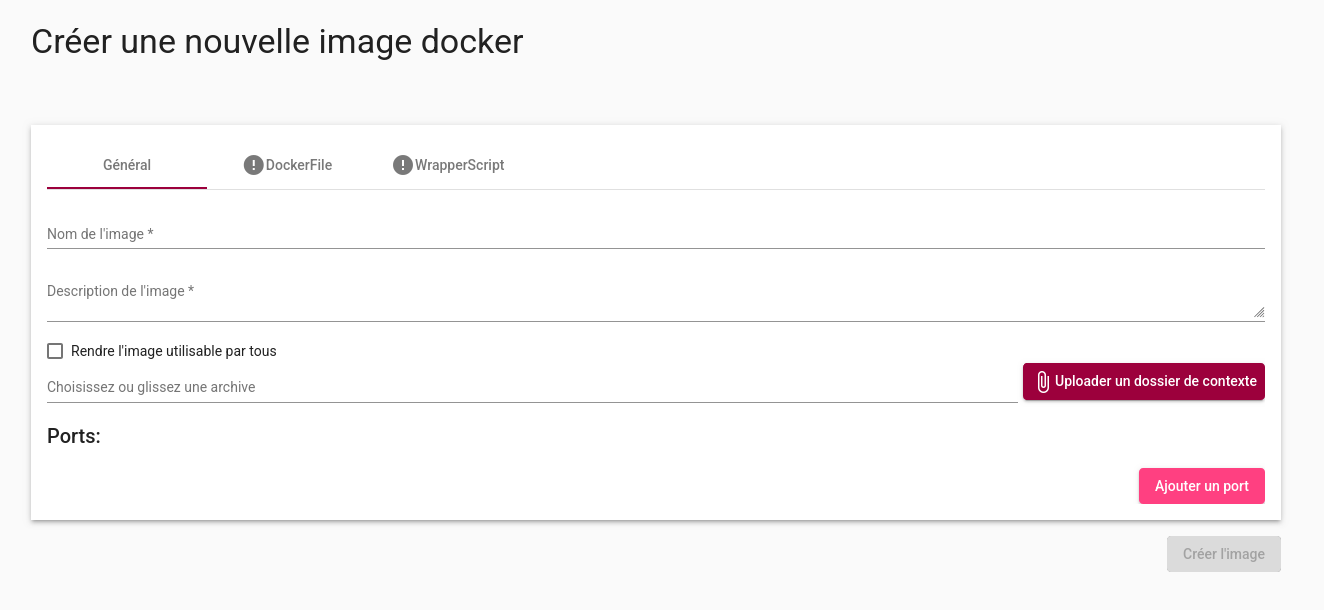
If you want to use the startup script wrapper_script.sh, you need to include the
following lines in the Dockerfile:
COPY wrapper_script.sh /usr/local/lib/wrapper_script.sh
ENTRYPOINT ["/bin/ash", "/usr/local/lib/wrapper_script.sh"]
Otherwise, you should place (for example) a # in the wrapper_script.sh tab so that it
is not empty.
The zip archive, if provided, is unpacked into the directory where the image is built.
You can then copy its contents into the image (for example a folder bla) with commands
such as:
COPY bla /blaBuilding an image with GitLab
To build more complex images, or images for which you want version control, you can rely on a forge such as GitLab. Many images are therefore built on the University Paris‑Saclay GitLab forge:
https://